
Audio cabling
| Keyman 🔑 | Crew |
|---|---|
| Lacey Cox | Ruben Martinez; Zabrina Bourgeois; Karina Li; Layo Kirby; TaSanee Kirby; Ronan Gav Budd; Meyana Barnhart |
Your team routes, labels and protects the main audio cabling.
Routing and handoff:
Audio Cabling delivers labelled cable ends; the receiving team makes the equipment connections. Stage owns the on-stage XLR microphone cable runs, and Power owns mains cables.
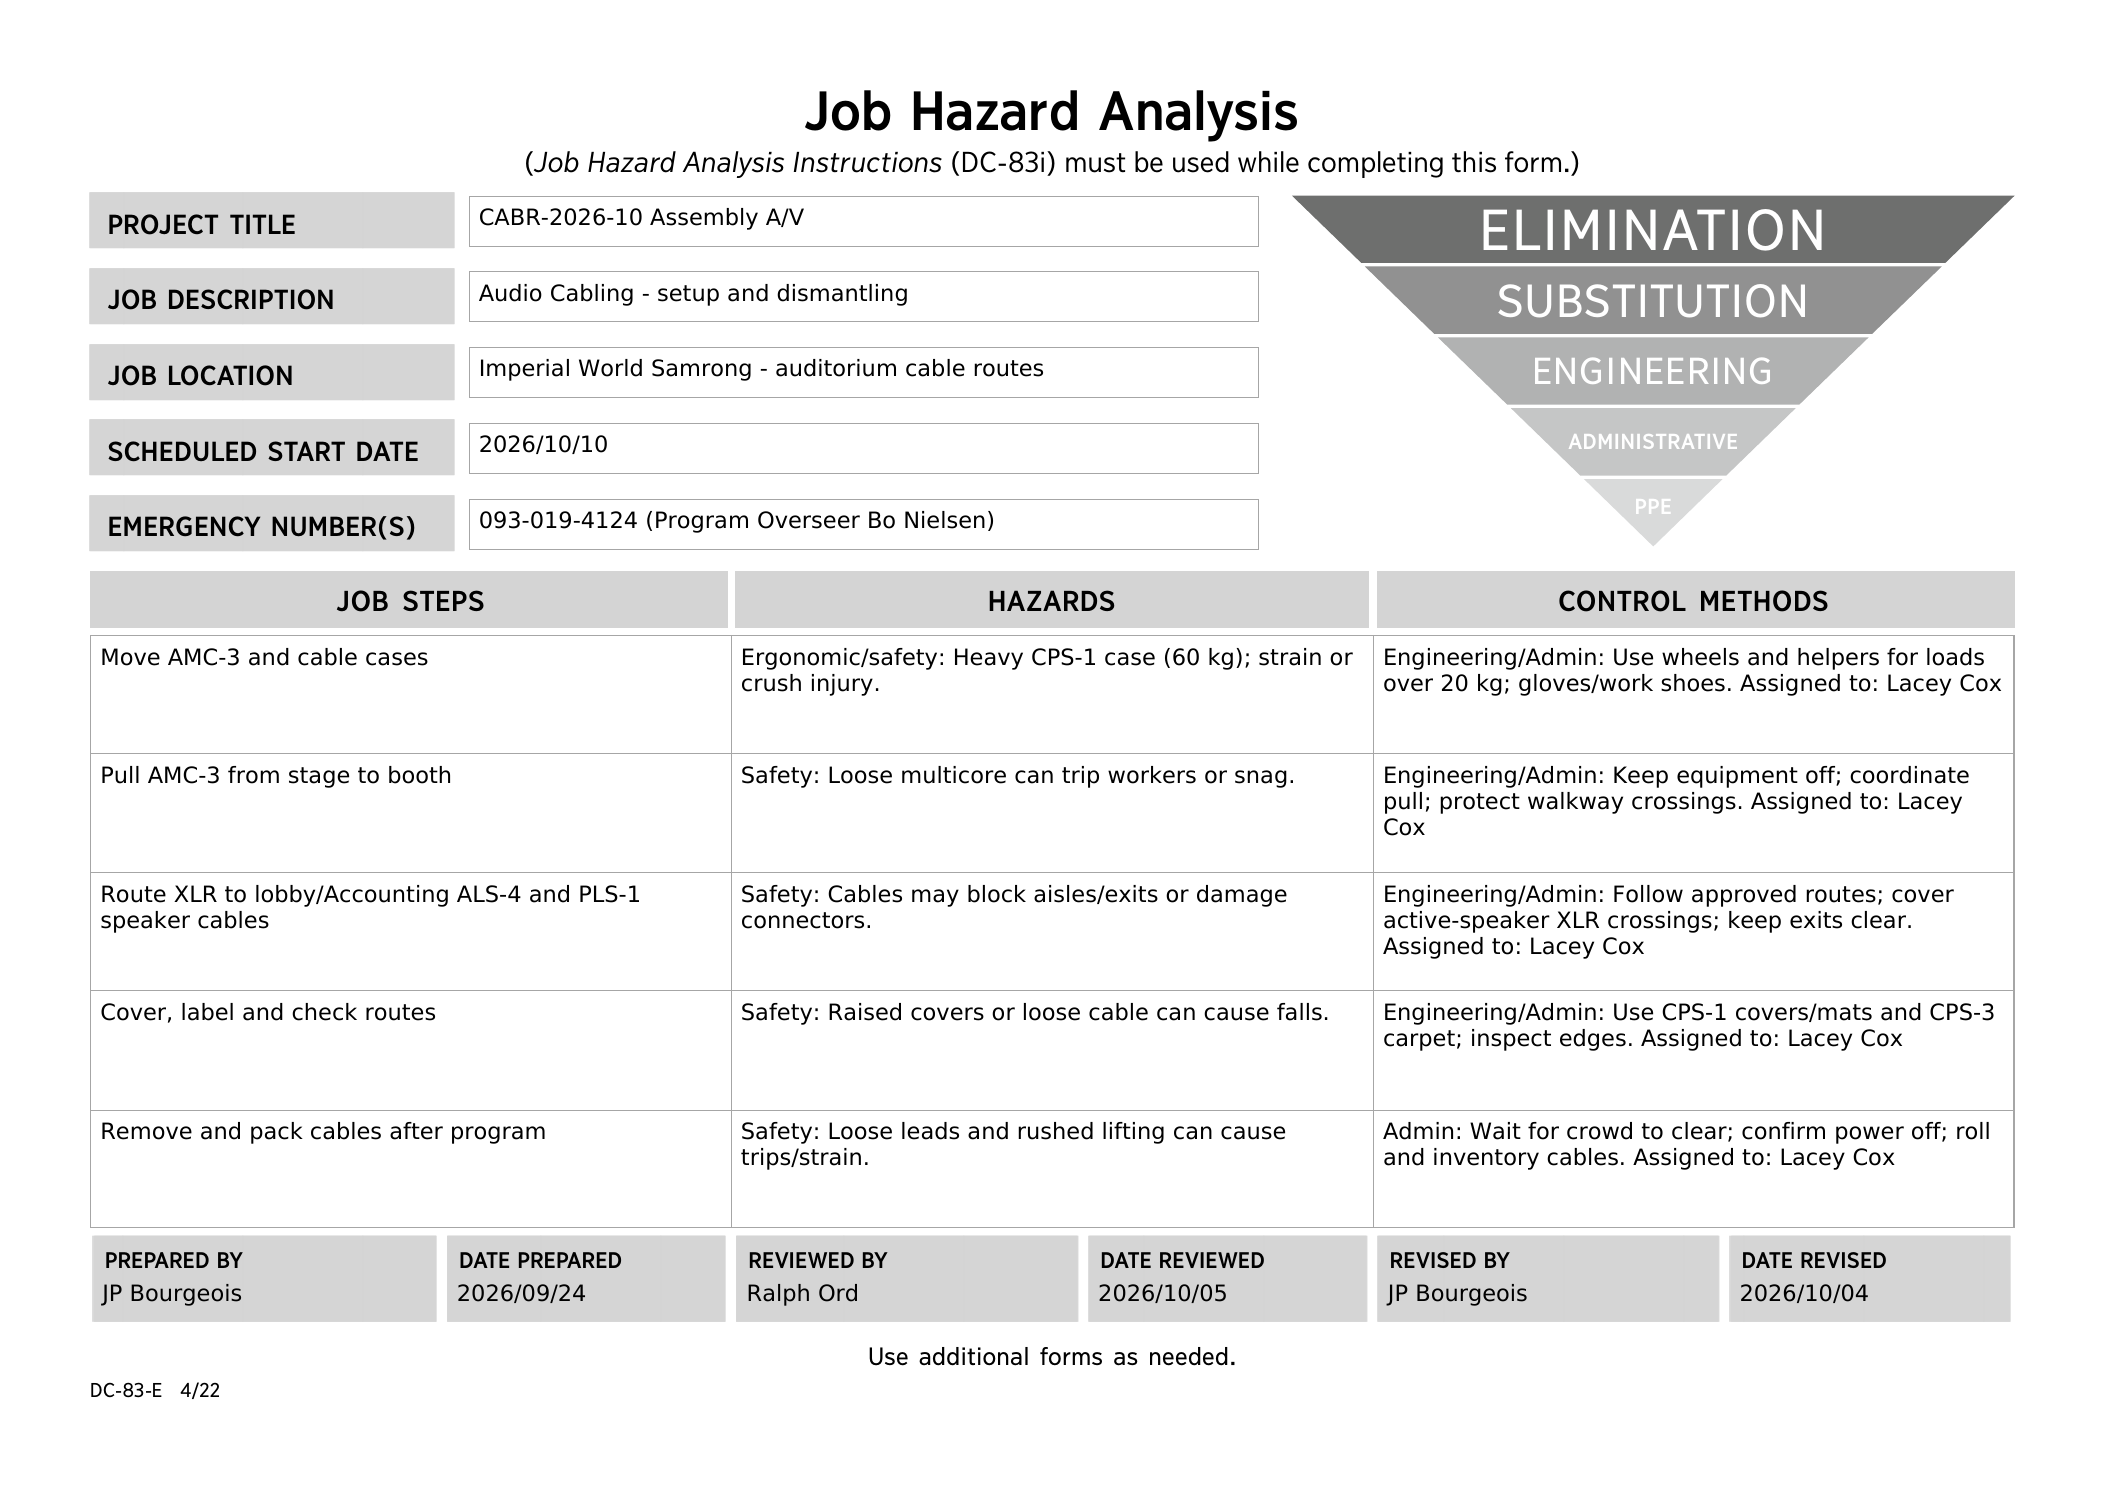
Before starting, meet Lacey, review the team’s DC-83, and open the schematics.
Safety:
Roll heavy cases and use helpers for loads over 20 kg; wear work shoes and gloves. Keep equipment switched off while pulling the multicore cable. Keep exits and walking paths clear. Accounting is beside the baptism area: agree that route with the Baptism overseer and keep cables and connectors away from wet floors.
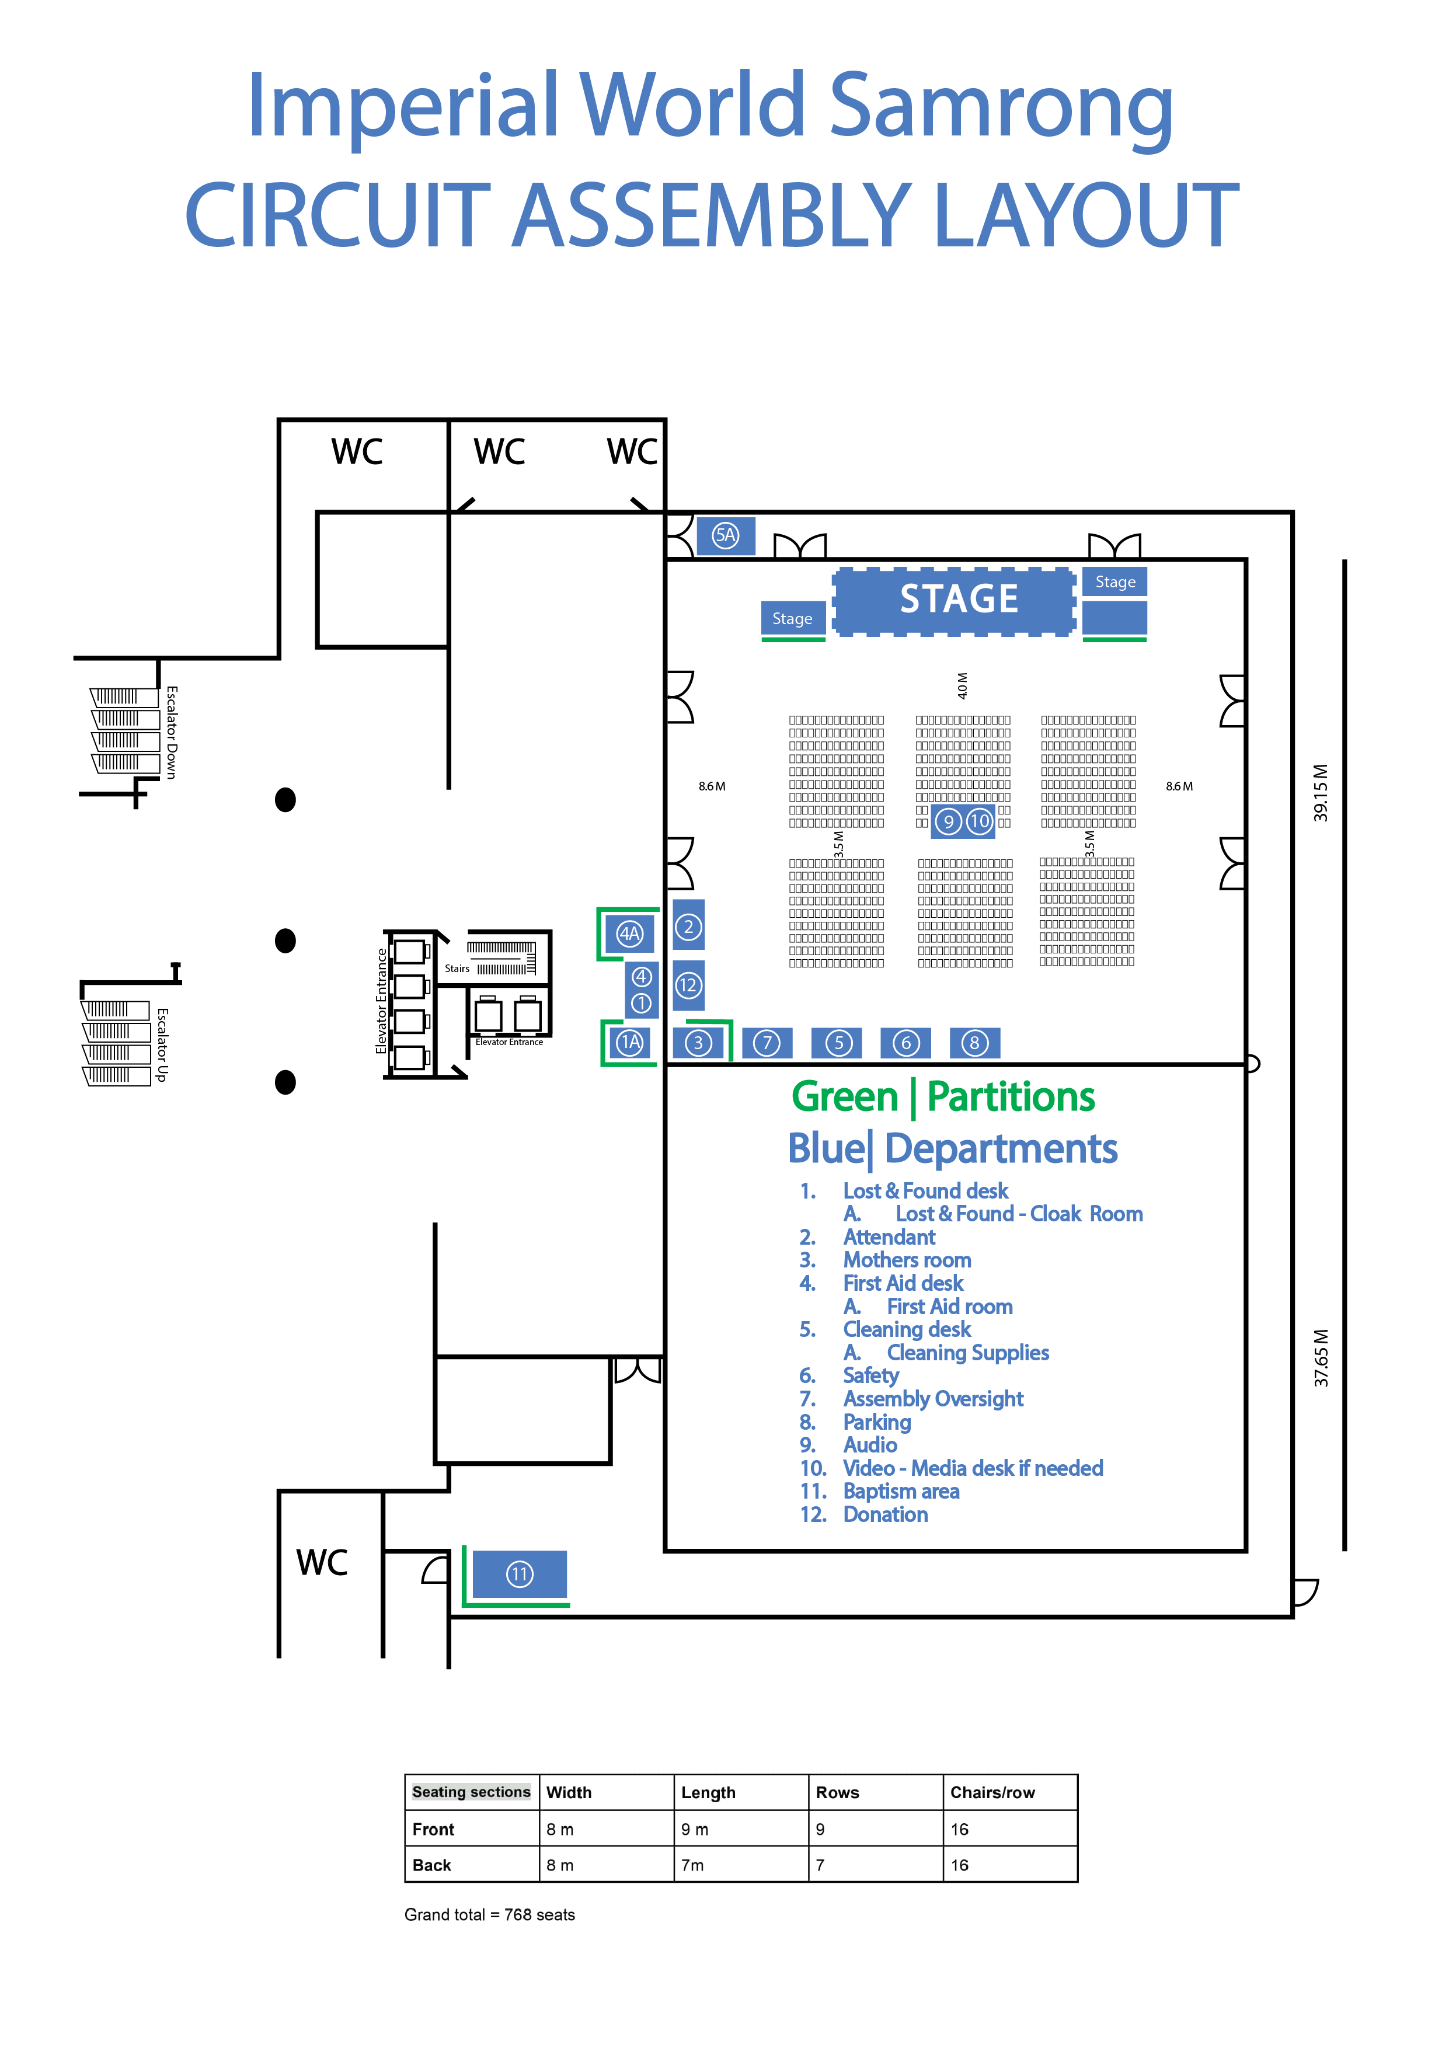
Main reference — Sheet 1-1. Use it for the A/V booth, loudspeaker positions and cable destinations.
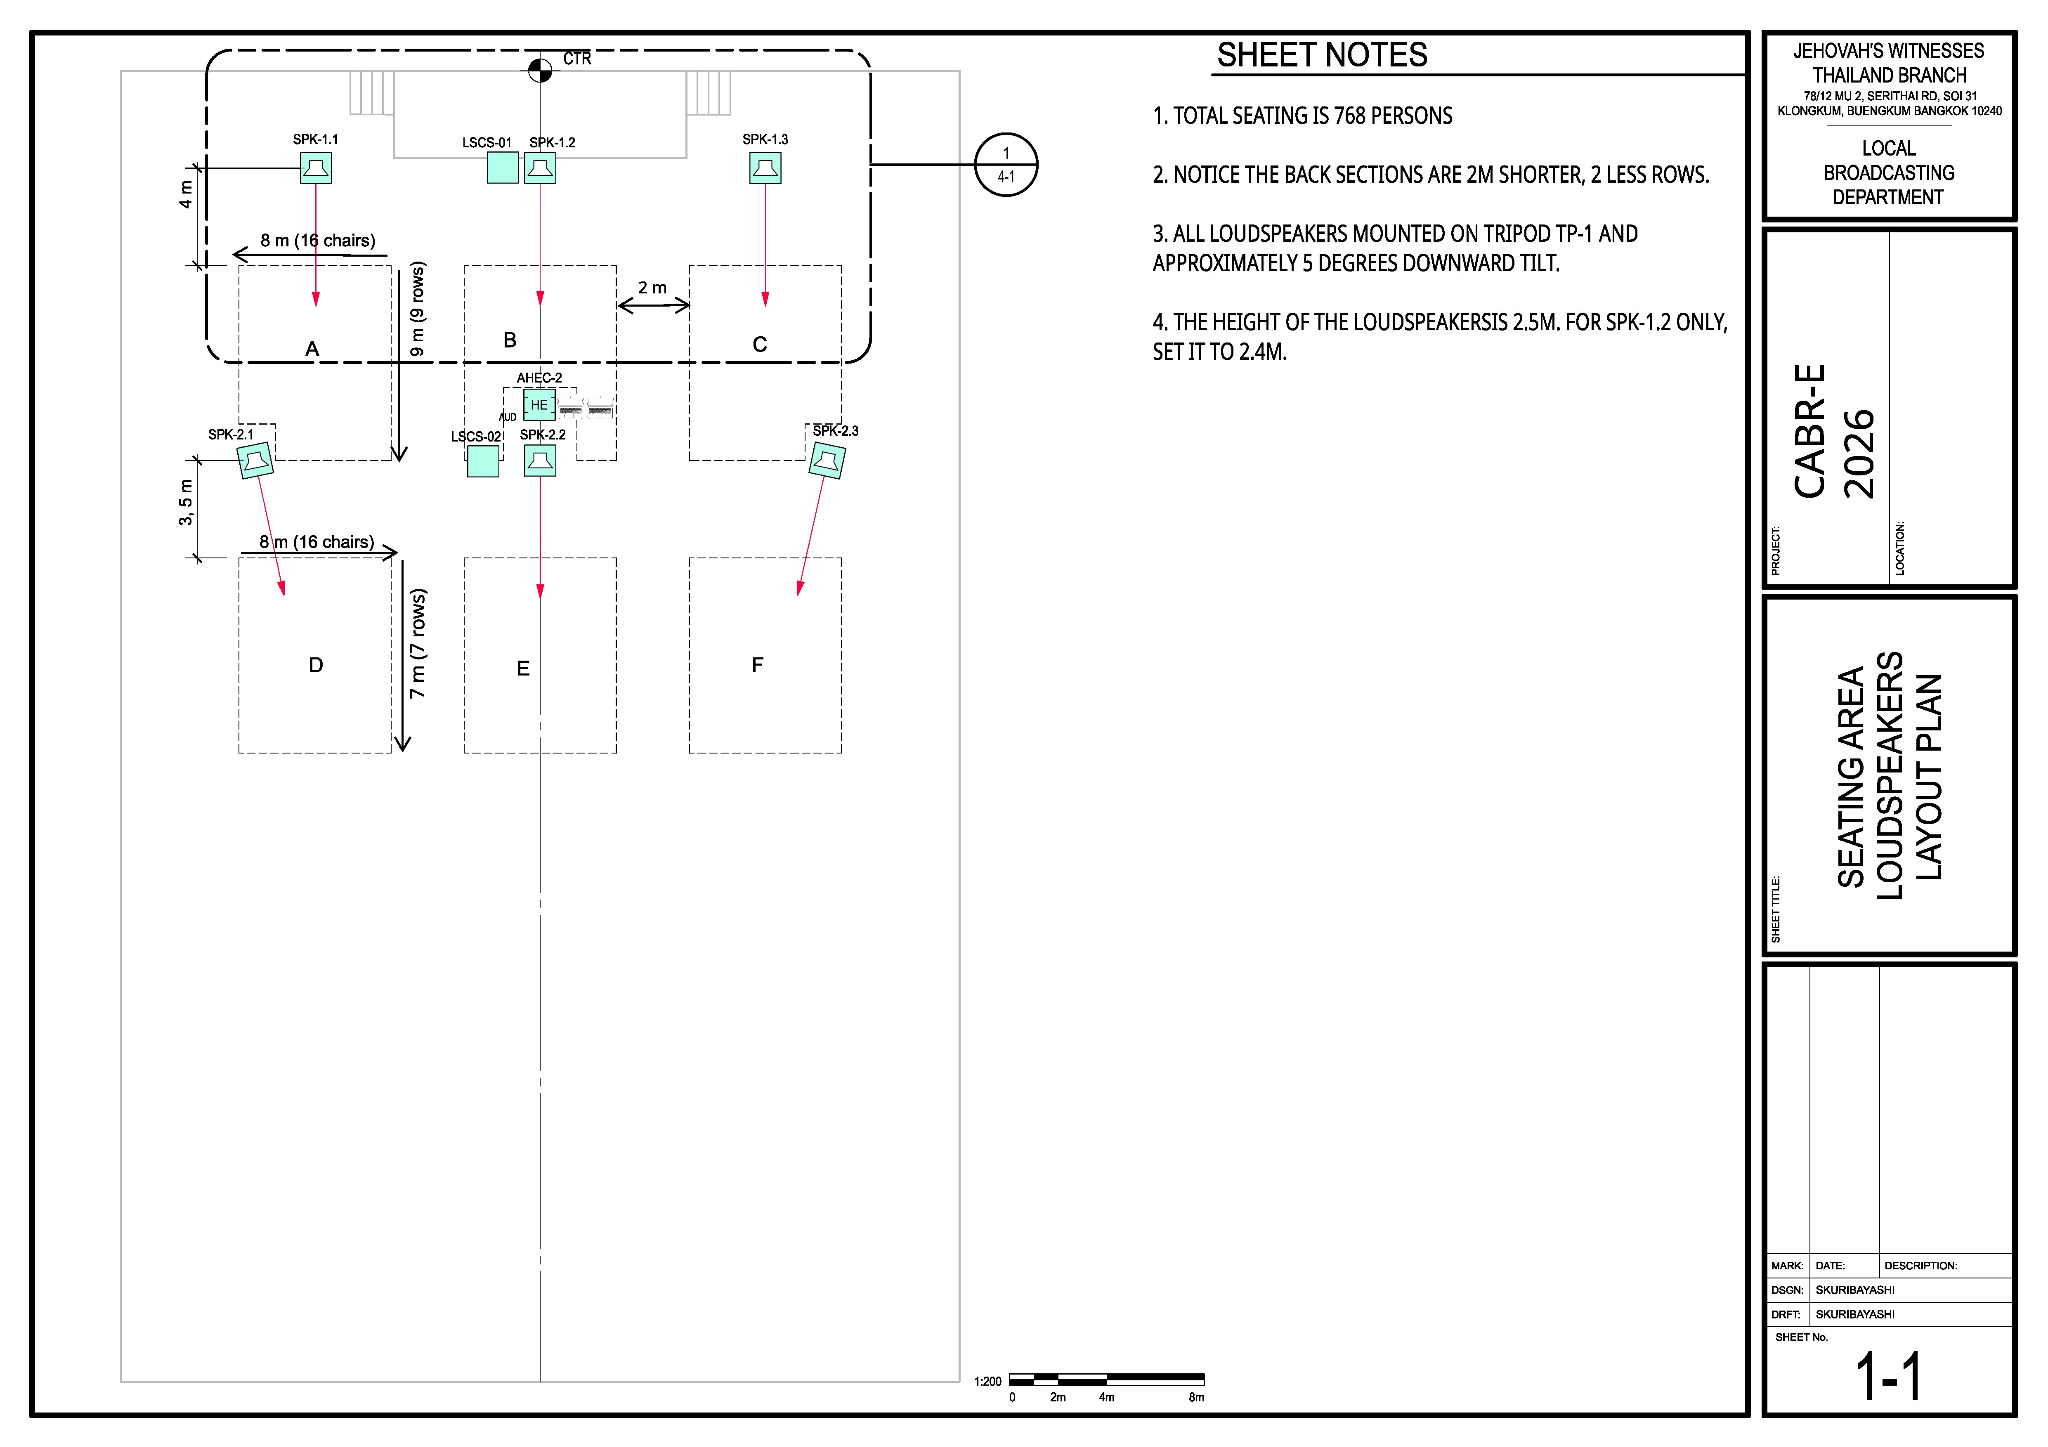
🗺️ View venue layout — departments and room orientation
Use this only to orient yourself to departments, partitions and room features. Use the CABR schematics for A/V placement.
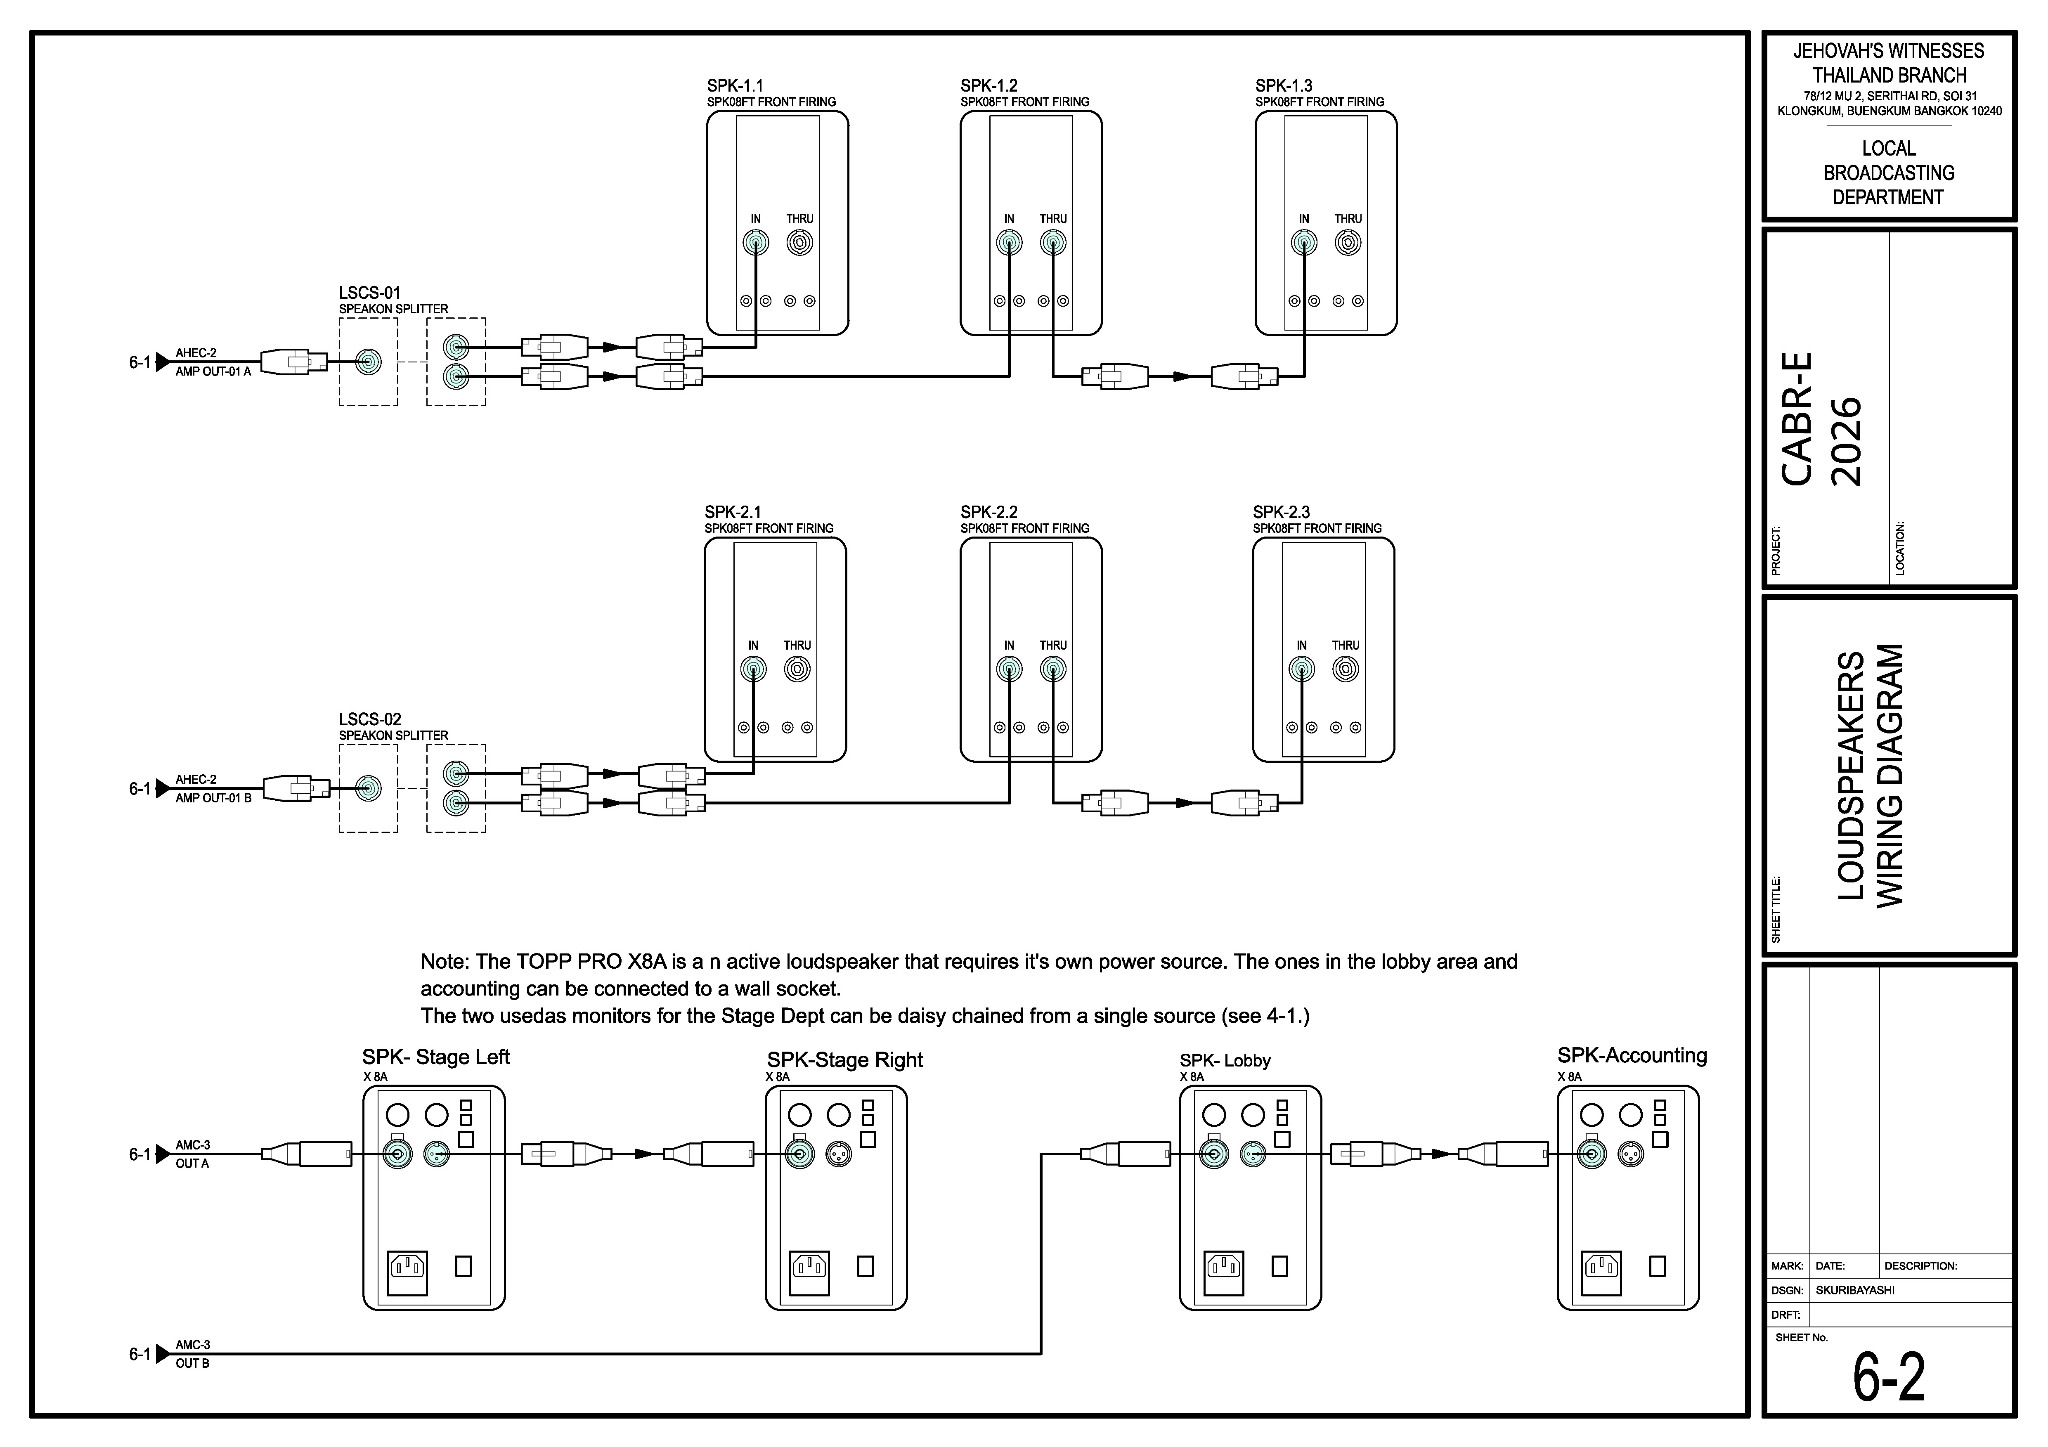
🔌 View Sheet 6-2 — loudspeaker wiring and splitters
There are two speakON splitters: LSCS-01 feeds the front loudspeaker group and LSCS-02 feeds the rear loudspeaker group.
What your team does
- Coordinate the pull with Lacey. Carefully lay the 30 m AMC-3 audio multicore (snake) cable from stage to booth; avoid sharp bends, protect connectors, and leave both ends ready for Stage and A/V Booth.
- Run the labelled speakON loudspeaker cables to the six passive-speaker positions. LSCS-01 is the front-group speakON splitter; LSCS-02 is the rear-group splitter. Leave enough slack and hand each speakON cable to Loudspeakers before the speaker is raised.
- Run the two XLR active-speaker cables: return A to the stage monitors and return B to the lobby and Accounting. Leave the labelled ends for Loudspeakers/A/V Booth to connect.
- Make the MIC-1–4 XLR cables and AMC-3 handoff ready for Stage. Confirm their routing to AMC-3 inputs 1–4 and labels are complete; help if needed.
- Run labelled XLR cables from the venue wireless-receiver location to AMC-3 inputs 5–6, ready for A/V Booth to connect.
- Protect floor crossings with CPS-1 cable covers/mats or CPS-3 carpet. Inspect the edges for raised or loose areas before handing over the runs. Help trace any cable that fails its test.
Extra help: When Stage, Loudspeakers and Power finish their own work, they should check with Lacey and help Audio Cabling with the remaining cable work.
Cable routing reminders
- Unroll cables without twists or kinks; keep attached Velcro with the cable.
- Avoid running audio cables parallel to power cables where practical; cross at right angles.
- Use only as much tape as needed.
- Before handoff, confirm each cable type, label and destination against the schematic.
For the keyman
| Run | Route | Drawing |
|---|---|---|
| AMC-3 | 30 m AMC-3 audio multicore (snake) cable: stage box → AHEC-2 at the booth | 4-1, 6-1 |
| Front speakers | speakON cable: Amplifier A → LSCS-01 (speakON splitter) → SPK-1.1 / 1.2 → 1.3 | 1-1, 6-2 |
| Rear speakers | speakON cable: Amplifier B → LSCS-02 (speakON splitter) → SPK-2.1 / 2.2 → 2.3 | 1-1, 6-2 |
| Stage monitors | XLR cable: AMC-3 return A → Stage Left → Stage Right | 4-1, 6-2 |
| Lobby / Accounting | XLR cable: AMC-3 return B → Lobby → Accounting | 6-2 |
When the protected routes pass their tests, tell Lacey and Alex. For teardown, follow the confirmed dismantling teams and instructions: wait for the audience to clear and the briefing to finish, confirm power is off, then coil and inventory the cables.